This guide walks school administrators and staff through setting up and using CBC Mate. Each school must first be registered by the System Administrator before any login is possible. Need to register your school? Contact us.
1
Register Your School
Contact the CBC Mate System Administrator to get started
Your school does not self-register. The CBC Mate System Administrator creates your school account and provides your login credentials.
Before you can log in, your school must be registered in the system. Contact us with your school's details.
Information to provide when registering:
- Full school name and physical address
- School type (Primary, Secondary, Combined, etc.)
- District and region
- School phone number and email
- Ministry of Education registration / license number
- Name and contact of the designated school administrator (person who will manage the system)
- School logo (PNG with transparent background, optional)
What you will receive:
School Login ID
e.g. SCH-00042
Used by all staff at your school to identify your school during login
Admin Login ID
e.g. USR-10199
Your personal Login ID + a temporary password to change on first login
2
First Login
Sign in using your School Login ID and personal credentials
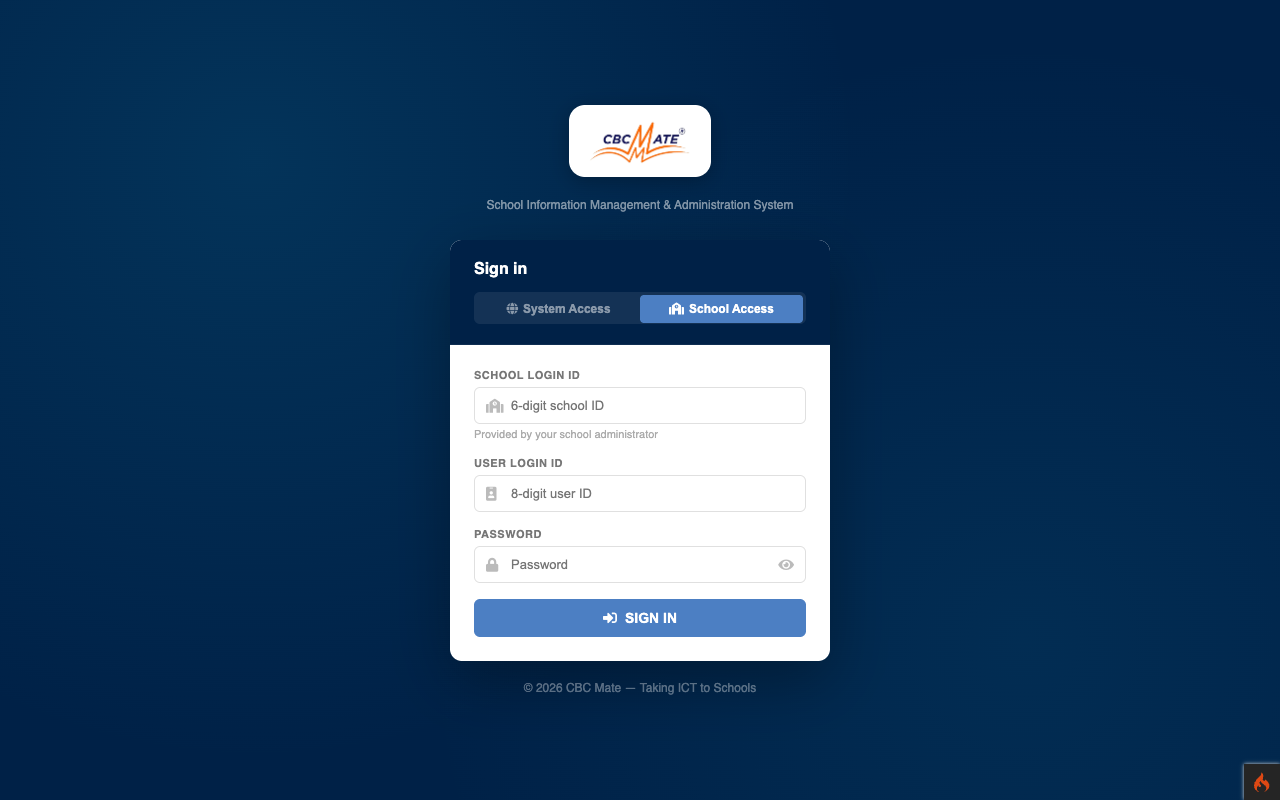
- Open your browser and go to cbcmate.com
- On the login page, click the School Login tab
- Enter your School Login ID (e.g.
SCH-00042) - Enter your personal Login ID (e.g.
USR-10199) - Enter the temporary password provided by the system administrator
- Click Login — you will be prompted to set a new password immediately
SCREENSHOT — LOGIN PAGE
On first login you are required to change your password. Choose a strong password — at least 8 characters with a mix of letters and numbers.
The rest of this guide is for logged-in staff
Steps 3–11 (Setup, Staff, Classes, Learners, Results, Attendance, Fees, Portals, Reports) and the User Roles reference are only shown once you're signed in to your school account.
Login to Continue